Tactile Paving Installation Guide
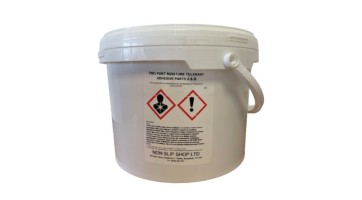
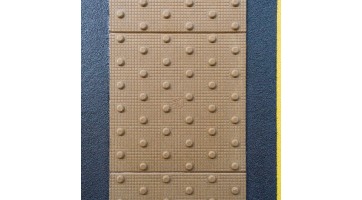
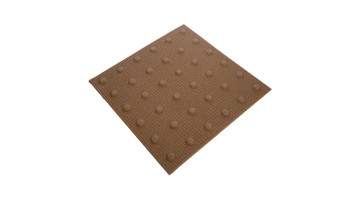
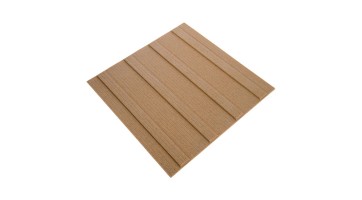
Installing our surface-mounted tactile paving can be done quickly and easily using our two-part moisture tolerant adhesive. Please see our recommendations below.
Area Preparation
A thorough assessment of the site conditions has to take place before any installation commences.
If the substrate you are bonding to is wet or the air temperature is below 5°C, do not install unless using the correct seasonal moisture tolerant adhesive.
The surface you are bonding to must be clean and free of any contaminants such as chewing gum, oil or grease.
The surface to be bonded to must be free from dust, loose stones or chippings. Surfaces will need to be brushed to remove loose materials and dust. Older sites may require the use of a jet-wash to ensure the surface is clean.
Water should not be built up in any areas where you intend to install the tactile. Do not worry if the surface is damp as our two-part moisture tolerant adhesive can be applied in damp conditions, but keep the area as dry as possible for best practice.
Should the substrate require patching, hole filling or levelling, a filling medium can be supplied to produce a stiff paste to fill these areas.
This should be applied to the required areas prior to the application of the tiles.
Following all surface preparation, we recommend that the surface be cleaned with a stiff bristled broom.
Following the above site preparation procedures please adhere to the following guidelines for the installation of the tactile surfaces.
Setting Out Surface Mounted Tactile Paving
Position the tactiles in the formation which is required and decide whether any tiles need to be cut to size.
In summary, the common setting out process is as follows:
-
Set out the area to be tiled and layout the tiles on the substrate in accordance with engineers drawings.
-
Lay tiles out on area to be tiled and chalk around them, or with a chalk line, ping lines around the external edges of the Tactiled area.
-
Then using Gaffer tape, tape to the outside of the chalk line to prevent any adhesive bleed onto the surrounding substrate.
-
Remove tiles. Re brush the surface to be tiled in preparation for the application of adhesive coatings.
Cutting Surface Mounted Tactiles
After the tactiles have been placed in the required position, any cuts that need to be made should be marked with a marker or pencil. The detailed grid on the tactiles can be useful when marking straight lines. When cuts are skewed, use a straight edge as a guide.
To cut tactiles an angle grinder or cut-off saw fit with a diamond blade should be used. A standard abrasive blade has the potential to be damaged due to the contents and toughened resin components of the tactile.
Place the tactile onto a board or piece of timber and ensure this is held securely, whilst the operator follows the marked line, slicing the tactile to the required size.
Masking Off The Perimeter
Mask off the perimeter of the area to ensure the resin adhesive does not spread to the non-tactile surface. We advise the tape be laid in 600mm strips, which helps to ensure the line is kept straight. Ensure the entire perimeter is marked with tape to prevent the adhesive from spreading past the area.
Once masking is complete, tactiles are removed so the area is clear. The tape is checked to ensure there are no loose ends and it is firmly in place.
Mixing The Two-Part Adhesive
Familiarise yourself with the Health and Safety data sheets in relation to the adhesive products you are about to use and make sure that you are wearing gloves and eye protection.
Our adhesive is a two-part moisture tolerant system, which comes in pre-batched quantities sufficient to cover at least 1.6m2. Part A is the base and part B is the activator.
The activator is poured into the pail containing the base resin, ensure you stir evenly and thoroughly for approximately 3 minutes.
The working life of the mix is around 20-30 minutes on sunny days and longer on colder days. Accordingly, the mix should not be mixed until 5 minutes or so before it is used.
In summary, the common adhesive mixing practice is as follows:
-
Take the part A and part B adhesives and utilizing a mixing paddle mix the two components together until they are totally consolidated.
-
Take the mixed adhesive and with the raked trowel pour a small amount of adhesive onto the substrate and rake to a thin layer with the trowel.
-
Until you are conversant with the system try to do areas of 2 – 3 tiles at a time ensuring that you have sufficient adhesive filling the area to be tiled.
Laying The Surface Mounted Tactiles
The adhesive mix is poured directly from the pail to the substrate and it spread over evenly with a notched trowel. Only enough adhesive is poured for the area of two tactiles at any one time to ensure the operative does not have to overstretch.
Once an area is covered with adhesive, tactiles are lowered onto the adhesive and are pressed down lightly. The flexibility of the tactiles allows them to be rolled into place, excluding any air pockets in the process.
Place the tactile carefully, as it is bad practice to re-lift the tactiles after placement which will weaken the bond. If you do need to move a tactile, it is best to lay down fresh adhesive beforehand.
-
Starting at the internal edge of the gaffer tape, lay the first tile ensuring that even pressure is applied to the tile so as to make sure that the total surface area has come in contact with the adhesive. Do not exert too much pressure as the adhesive will form a bead at the edge of the tile that may contaminate the next tile that you lay.
-
Continue to lay the tiles in this manner. Do not slide the tiles as you will create a ridge of adhesive that will contaminate the top of the tiles.
-
Should you need to cut the tiles use a diamond disc. Place the tiles on a piece of ply or m.d.f. and without exerting too much pressure with the cutting saw, hold the tile and pass the saw through the tile in a smooth and constant motion.
-
When you have finished laying all of the tiles, make sure that there is no bleed over or contamination of the tiles with excess adhesive. (Should you need to remove adhesive from the tile surface use white spirit).
-
When completely satisfied that the gapping of the tiles has remained accurate and the appearance of the tiled area is to an acceptable standard you can remove the gaffer tape surrounding the tiles. When removing the tape always peel away from the tiles so as not to allow any excess adhesive to drip on to the tiled area.
-
When all tapes and any excess adhesive have been removed, broadcast a light coating of kiln dried sand on to all tile gaps and edgings.
-
When sufficient time has elapsed, to enable the curing of the adhesive to take place and the sand is completely bonded to the adhesive, sweep the surface of the tiles with a soft broom to remove any excess sand.
By following our recommendations of best practice, you should achieve a fast and simple installation method to sucessfully lay Surface Mounted Tactile Paving across your desired area.